Araku Valley Photos: Capturing the Beauty of the Eastern Ghats
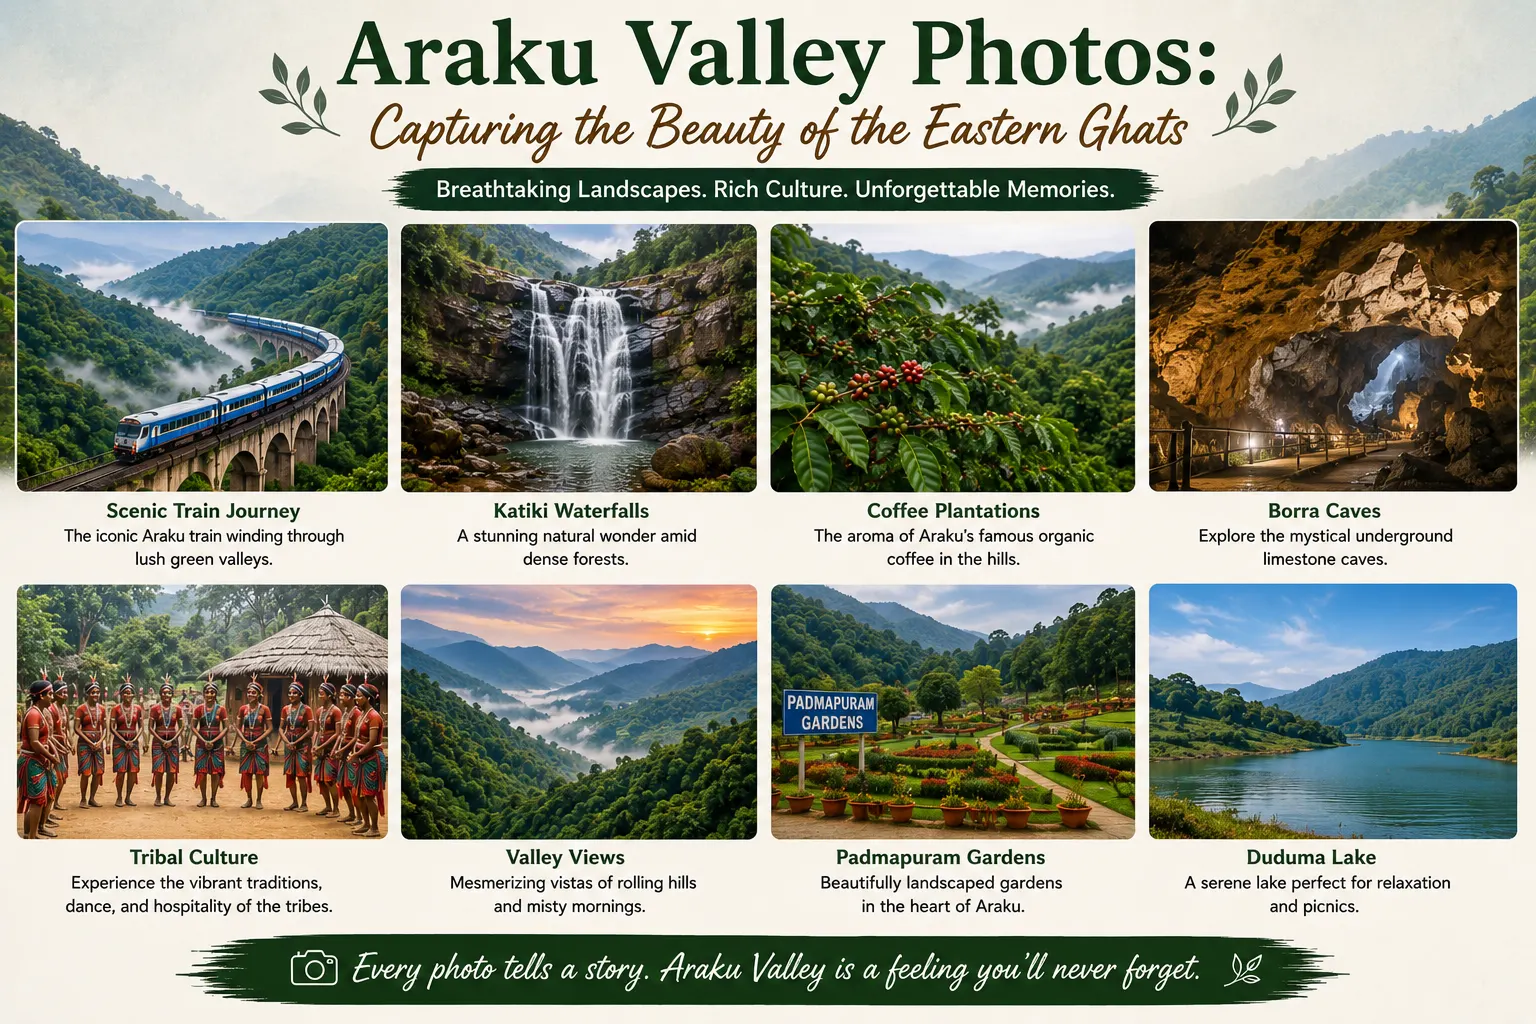
Araku Valley Photos: Capturing the Beauty of the Eastern Ghats
Photography and Araku Valley share a natural affinity. The misty landscapes, dramatic cave formations, vibrant tribal culture, and varied terrain provide subjects that reward photographers of all skill levels. Understanding where and when to photograph helps visitors return home with images that capture the valley’s essential character.
The iconic Araku Valley photos that circulate on travel platforms emerge from specific conditions, locations, and techniques. Learning what creates those images improves your chances of capturing comparable results during your own visit.
Top 5 Scenic Viewpoints for Landscape Shots
Landscape photography in Araku benefits from elevated vantage points that reveal the terrain’s scale and character. Several established viewpoints provide access to these perspectives.
The Galikonda view point ranks as the premier landscape photography location. At approximately 4,320 feet elevation, this vantage overlooks valleys, ridges, and the railway line far below. The sea of clouds phenomenon during winter mornings creates the images most associated with Araku destination marketing. Arriving before sunrise positions you for the optimal light and mist conditions.
The Ananthagiri viewpoints along the Vizag-Araku route offer intermediate elevation perspectives. These roadside locations require less commitment than the Galikonda journey while still providing layered mountain views. If you are handling the wheel yourself up these steep inclines to chase the dawn, reviewing our Vizag to Araku by car guide outlines crucial safety driving advice. Multiple pullouts exist, so experiment with several positions.
Damuku View Point appears along the ghat road, offering views across the terrain you’ve climbed or will descend. The perspective back toward the route traveled provides context that other viewpoints don’t capture.
Viewpoints near the Borra Caves area reveal a different terrain character than the higher Araku positions. The forested slopes and river valley below show alternative aspects of Eastern Ghats geography.
Coffee plantation viewpoints scattered throughout Ananthagiri and its surroundings frame the orderly rows of coffee plants against hillside backgrounds. These agricultural landscapes provide subject matter distinct from wild terrain. To capture these estate fields at their visual peak when bright red coffee cherries cover the crops, align your holiday with the seasonal picking timeline detailed in our guide on the best time to visit Araku Valley.
Tips for Photographing Inside Borra Caves
Cave photography presents unique challenges that surface techniques don’t address. Understanding the specific conditions inside Borra Caves improves image success rates.
Light levels inside the caves remain low despite artificial illumination. This darkness requires either high ISO settings that introduce noise, slow shutter speeds that blur handheld shots, or a flash that changes the lighting character dramatically. Each approach involves trade-offs. To better understand the interior lighting paths and major rock formations before heading down the steps, consult our comprehensive Borra caves guide.
Tripod use would stabilize cameras for long exposures, but carrying restrictions or crowd conditions may limit practicality. Bracing against railings or stable surfaces provides alternative stability. Image stabilization technology in modern cameras and phones helps but cannot eliminate all motion blur at slow speeds.
The colored artificial lighting creates color balance challenges. Auto white balance settings may produce unexpected results as cameras interpret the unusual illumination. Shooting in RAW format allows post-processing adjustments that JPEG captures don’t permit.
The scale of formations benefits from including human figures for reference. Without people, stalactites and stalagmites may appear smaller than their actual impressive dimensions. Positioning companions within compositions adds scale context.
Natural light penetrating through cave openings creates drama where it occurs. Exposing for these bright areas renders cave interiors very dark; exposing for dark areas renders light areas as blown-out white. HDR techniques or exposure bracketing addresses this dynamic range challenge.
Flash photography, where permitted, reveals colors and details that ambient lighting obscures. However, the direct flash effect differs dramatically from the cave’s natural appearance. Bouncing flash where ceilings allow, or using off-camera flash for directional lighting, produces more natural results than direct on-camera flash.
Capturing the Colors of the Tribal Museum
The Tribal Museum offers subjects including artifacts, traditional clothing, and occasionally live performances. Indoor museum photography involves different considerations than landscape work.
Display lighting typically favors viewing over photography, meaning light levels may be lower than optimal. Increased ISO, stabilization techniques, or flash where permitted address this constraint. You can chart your walking route through the indoor exhibits smoothly by following our dedicated Araku Tribal Museum guide.
Reflective glass over displays creates glare that obscures subjects and introduces unwanted reflections. Positioning your camera at angles to the glass, using polarizing filters, or finding openings in display cases improves results.
The colorful traditional clothing and artifacts provide saturated subjects that translate well photographically. Getting close enough to capture detail while maintaining context requires lens versatility or strategic positioning.
During live cultural performances, motion becomes a factor. Dancers moving through traditional patterns blur at slow shutter speeds. Faster speeds freeze motion but require more light. The trade-off between motion blur artistic effects and sharp captures depends on your intent.
Respecting photography restrictions maintains good relations with museum staff and local communities. Some areas or items may prohibit photography for cultural reasons. Compliance demonstrates respect that confrontation does not.
Best Time of Day for Misty Valley Photography
The atmospheric conditions that define Araku’s photographic appeal occur at specific times that planning should incorporate.
Pre-dawn through early morning, approximately 5:30 AM to 8:30 AM during winter months, provides the prime window for mist photography. Temperature inversions overnight trap moisture in valleys while hilltops remain clear. This differential creates the famous sea of clouds effect. To prepare your camera gear for these freezing, dew-heavy mountain conditions, it is highly recommended to check the cold Araku Valley weather in December metrics.
Arriving at viewpoints while it is still dark positions you for the complete progression from night through blue hour through golden light. This extended window captures varied conditions within a single session.
The mist typically dissipates as morning warmth builds. By mid-morning, the atmospheric conditions that created dramatic scenes may completely disappear, leaving clear views that lack the romantic quality of earlier hours.
Evening golden hour, approximately one hour before sunset, provides a secondary opportunity for atmospheric photography. The light quality differs from morning, with warmer tones and different shadow angles. Fog may not be present, but the soft directional light enhances landscape dimensions.
Completely overcast conditions, common during monsoon, eliminate the directional light that creates drama but may produce moody atmosphere shots of their own. Adapting to available conditions rather than abandoning photography when ideal conditions don’t appear maximizes image variety.
The weather unpredictability means that perfect conditions may or may not appear during your specific visit. Multiple viewpoint visits across different mornings of a multi-day trip increase your chances of catching optimal conditions at least once. If you decide to base your vacation in the central town plateau to remain close to early transit loops, you can scan options via our Araku valley hotels index or handle an instant online Araku valley rooms booking.
Conversely, for secluded high-altitude stays near the misty mountain gaps, explore a tranquil Ananthagiri hills resort booking setup or choose from low-cost choices on our low price hotels in Araku valley portal.
Strategic Routing for Photography Collections
Araku Valley photos reward preparation, flexibility, and a willingness to work with whatever conditions present themselves. The destination’s photographic richness ensures that attentive photographers return home with images worth preserving regardless of whether conditions achieved absolute perfection.
To ensure your camera gear is easily transported between these spread-out mountain vistas without logistical stress, you can book a dedicated vehicle via our Araku cab booking portal or check typical transport outlays using the Vizag to Araku cab fare log.
For a completely pre-arranged holiday where your valley stays, transport, and route timings are automated to hit major overlooks right at golden hour, select a premium Araku Valley 1-day tour package, a comprehensive Araku valley tour package 2 days, or explore the full line of options on our Araku valley tour travel packages portal.
Where is the best spot to photograph the winter “sea of clouds” mist?
The absolute best location is the Galikonda View Point. Situated over 4,300 feet above sea level, it gives photographers an elevated, unobstructed view over the entire valley basin, capturing heavy fog layers settling between the mountain ridges.
Is a tripod allowed inside Borra Caves for photography?
While tripods are generally not officially banned, using them can be highly impractical during peak daytime hours due to narrow walkways, low lighting paths, and heavy tourist traffic. Relying on high ISO settings, wide-aperture lenses, or bracing your camera against stable railings is usually much more effective.
Can I photograph the local tribal communities and Dhimsa dancers?
Yes, but practicing proper travel etiquette is essential. While cultural performances inside the Tribal Museum are open for photography, always ask for permission before taking close-up portraits of indigenous community members at local roadside stalls or weekly markets.
What is the best lens choice for a landscape tour of Araku Valley?
A versatile wide-angle zoom lens (such as a 16-35mm or 24-70mm equivalent) is ideal. It allows you to capture the sweeping vistas at mountain overlooks while retaining the flexibility to frame detailed rock formations inside the caverns.
How can I plan an itinerary that covers all the top photography spots?
To maximize lighting conditions without backtracking, it is best to group attractions directionally—capturing mountain viewpoints at dawn, indoor museums during harsh midday sun, and waterfalls in the late afternoon. You can browse completely optimized, photography-friendly routes via our Araku valley tour travel packages index.
All Categories
- Araku Cab Service
- Araku Coffee
- Araku Tour Packages
- Araku Tourist Places
- Araku Trip Packages
- Araku Valley for families
- Araku Valley shopping
- Araku Valley Timings
- Araku Valley Trip Cost
- Araku Weather
- Camping in Araku Valley
- Hidden Spots
- Hotel & Rooms
- Hotels & Resorts
- Stay & Food
- Tatipudi Reservoir
- Tent camping
- Transport & Safety
- Travel Guides
- Vizag Attractions
- Vizag Beachs
- Vizag Cab Services
- Vizag Travel Planning
Recent Posts

Vizag Family Tour

TU-142 Aircraft Museum Guide

Vizag One Day Tour
Tags